Tuesday, January 10, 2012

From eggs to chinese food


So blogging is frustrating to me as I cannot get my pictures how i want them. Plus I am already posting on facebook and on Just Mommies so blogging is a ways out there and besides it is not like any one is looking here any ways and since I can get a nice recorn on JM why do I want to come here? Well just in case you are here or I come back and look i am going to try again.
Any as you might be able to tell from the title we have advance from Eggs to Chinese food. Yes eggs are excellent for food storage as we do have laying hens but Chinese food is rice and I have what 400lbs last count.
Following our porridge theme my first recipe was Jook AKA Rice porridge and to tell you the truth it was very difficult to fine this recipe. As you can see why, it isn't really a recipe just a new ratio. 1 cup rice to 9 cups water and OMG I can feed my family breakfast for a week particularly as they did eat much. Any way since it takes so long to cook I tossed it in the crock pot the night before and it was ready in the morning. NICE.
Wayne ate his Jook Chinese style with soy sauce, green onions, and left over pork, I ate mine American style with maple brown sugar and butter. The kids I dressed with nasty fake blueberry syrup. Scarlett ate hers, Beau wanted to feed himself.
Wayne says he'll eat potatoes, which we bought way cheaper than rice (potatoes .10lb rice .52lb) and we can grow more potatoes, rice not so much.
We also made homemade egg rolls. They were great! Since I have a pasta roller I could make the skins from scratch too. Any way these were delicious!

Tuesday, January 3, 2012

Eggs...

Yesterday I was very busy cooking! The first week of 52 weeks of cooking is Eggs! Since our hens have just started laying this is a very important protien for us. Since Wayne is allergic to eggs it is an area I don't often explore either. Our hens have been giving us beautiful eggs and we need to use them. The pickled egg recipe is definately going to help us keep eggs longer. How can you not get excited about eggs when you have this to work with?

[IMG]http://i149.photobucket.com/albums/s68/azbrat0526/100_7725.jpg[/IMG]


Corned beef and egg burgers

[/img]https://fbcdn-sphotos-a.akamaihd.net/hphotos-ak-snc7/402045_332351576788989_100000424490546_1132974_2125030834_n.jpg[/img]

CORNED BEEF AND EGG BURGERS Read more about it at Cooks.com - Recipe - Corned Beef And Egg Burgers Content Copyright © 2011 Cooks.com - All rights reserved.

1 large egg
1/4 can corned beef
3 or 4 Ritz crackers, crumbled very fine
pepper to taste (do not use salt...the corned beef will make this salty enough)

In small bowl, beat egg, adding pepper, as in making scrambled egg. Do not add milk. Then using a fork, mash into the egg the 1/4 can of corned beef until the mixture is a smooth, even consistency through-out. Then add the Ritz cracker crumbs, and stir further until all ingredients are thoroughly mixed, and mixture will hold a peak when lifted. This mixture will produce 2 patties, and the recipe can easily be doubled, tripled, or whatever. Spoon equal amounts of mix into a skillet, and fry on medium heat until golden brown on each side. Dress the burgers with your favorite condiments.

I was not impressed with this recipe. The canned corned beef was $5 a can and we just didn't like it that much. DH though it was too eggs even though I cut back on the eggs. Tyler said it went down like a burger and oddly enough Scarlett ate and ate and ate the burger. Go figure. Any way it is simple enough that I can recreate it from my head if we ever need to eat a can of corned beef. The store had three brands and we used the most expensive in this recipe (Libby) The other cans I bought are a different brand, so that may make a difference. Since we didn't like this we probabkly won't try the loaf in my idea area. As far as food storage we would rather buy three cans of chicken or a can of beef in gravy for the same price or cheaper.

Egg Nog the recipe on my ideas is a raw recipe and I went with a cook egg nog from my Better Homes and gardens cook Book.

Over cooked Egg Nog.
[/img]https://fbcdn-sphotos-a.akamaihd.net/hphotos-ak-ash4/373968_332351466789000_100000424490546_1132972_399859340_n.jpg[/img]

Second try
[img]https://fbcdn-sphotos-a.akamaihd.net/hphotos-ak-snc7/409341_332351506788996_100000424490546_1132973_132806747_n.jpg[/img]

Egg Nog

6 beaten eggs
2 cups milk
1/3 cup sugar
2 to 4 tbs rum
2 to 4 tbs bourbon1
tsp vanilla
1 cup whipping cream
2 tbs nutmeg

In a large heavy saucepan mix eggs milk and sugar. Cook and stir (watch carefully) over medium heat til mixture coats a metal spoon. Remove from heat. Cool quickly in a ice water bath. Stir while cooling. Stir in rum, bourbon, vanilla, Chill 4 to 24 hours. Before serviving whip cream and fold into egg nog. Sprinkle with nutmeg.

Eggs Pickled with Dill

[img]https://fbcdn-sphotos-a.akamaihd.net/hphotos-ak-ash4/377527_332351410122339_100000424490546_1132971_1657825935_n.jpg[/img]

PICKLED DILL EGGS

12 hard-cooked eggs, shelled
1 medium onion, sliced thin
3 /4 cup water 1 cup sugar
1 1/ 4 cup vinegar
2 teaspoons salt
1 teaspoon dill weed
1 /4 teaspoon garlic powder or 1 clove garlic, halved
1 /2 teaspoon mustard seed

Pack eggs and onion in 1-quart or larger jar. Bring other ingredients to a boil. Then simmer 5-7 minutes. Pour over eggs. Chill 3 days before serving. Eggs will be yellow.

Creamy Poached eggs.

[img]https://fbcdn-sphotos-a.akamaihd.net/hphotos-ak-ash4/397293_332351643455649_100000424490546_1132975_757524009_n.jpg[/img]

This is from better homes and gardens new cook book. Can you believe I never poached an egg and it was incredibly easy! This recipe was yummy and we are definately going to try it again.

2 english muffins or bagel
3/4 cup shredded american cheese
3 oz cream cheese with chives
1/2 c milk
4 eggs

Toast muffins or bagels. In a medium skillet combine cheeses and milk. Cook and stir over medium heat until cheeses melt. Break an egg into a cup, slide egg into mixture. repeat with remaining eggs. Cover cook over medium low for 3 to 5 min. Top muffin or bagel with egg. Stir cheese mix with wisk and spoon over eggs.

Saturday, December 31, 2011

52 weeks of cooking!


So over at Just Mommies.com I am participating in a cooking chanllenge. We will be given a topic to cook each week and score points. I think this is going to help me get motivated here as well. We already have our first months Topics. Week 1: Eggs Week2: Chinese Week 3: soup Week 4: Pan-Frying.
I already have a lot of ideas for the Egg topic and it is as if our hens have heard the hype in the house, as they have stepped up the laying. I never realized how versital eggs really are my ideas span everything from Egg nog, to egg noodles. Since Wayne is allergic to eggs I am having to use them in creative ways or feed them to me and Tyler, since Beau and Scarlett hardly eat anything.
I have two recipes that use canned corned beef. I am really excited to give them a whirl. Wayne wants me to try pickling eggs too, I am hoping to find a recipe that used dill. All my choices are going to be important for our food storage, as eggs are the easiest protein for us to come up with!
This morning we had cornmeal mush with fried apples. I was worries as there was no sugar in the mush as it cooked. I served it with butter and colored sugar. Scarlett played in hers, Beau ate good today.
Lunch was split pea soup. My husband hates peas and had resisted pea soup for year, BUT he sain he liked the soup! yay.

CORNMEAL MUSH

Read more about it at
www.cooks.com/rec/view/0,195,147183-243207,00.htmlContent Copyright ©
2011 Cooks.com - All rights reserved.
2 c. cornmeal
2 tbsp. flour
2 tsp. salt
2 c. cold water
4 c. boiling water

Put 4 cups water on to boil. Mix dry ingredients in 2 cups cold water, then add boiling water and cook until thick. May be served warm with milk and sugar or poured into loaf pans until
firm. After the mush is firm and cooled, may be sliced and fried.

Thursday, December 29, 2011

Oatmeal breakfast of champions


Well Christmas came and went and my family survived! With three kids under three it was questionable a few times. We only had our tree up for less than a week. witht he holiday I took a break from the food prepping. Well maybe just a little bit. With the idea of preparing food without every modern convience I am looking at old fashioned cooking. Since I am pretty aware of pioneer cooking thanks to 'Little House on the Prairie" I am looking into old fashioned British cooking or even just British cooking. So in the middle of the night doing those long 3am breasfeeding sessions I am watching old episodes of "Oliver's Twist" Any way I tried an old fashioned boiled pudding called Spotted Dick. The recipe was in metric so it was fun to translate.
Any back to the quest to get my kids to eat oatmeal. Today I am eiteher the best mom in the world or the worse. I made no bake oatmeal cookies and believe it or not my kids ate them up... maybe it was the two cups of sugar? or maybe the chocolate? who cares!!!!!!!?

CHOCOLATE OATMEAL NO-BAKE COOKIES

Read more about it at
www.cooks.com/rec/view/0,2310,154177-234202,00.htmlContent Copyright ©
2011 Cooks.com - All rights reserved.
2 cups
sugar1/2 cup cocoa1 stick butter1/2 cup
milk1 tsp. vanilla3 cups quick-cooking oatmeal1/2 cup peanut butter
Combine sugar, cocoa, butter and
milk in a saucepan. On medium heat, bring to a boil for one full minute.
Remove from heat. Stir in peanut butter (optional), vanilla and oatmeal.
Drop by spoonful onto wax paper. Let cool for at least 30 minutes.

Saturday, December 17, 2011

Mama Bear Porridge


So on our quest to feed ourselves and our kids Porridge I came across a cool sounding recipe for oatmeal. I was intrigued buy the fact that the finishing touch on it was stirring in eggs. Since our hens are giving us up to 3 eggs a day I need a good way of incorporating those treasures into our diet and really an oatmeal dish with a kick of protein just sounded very healthy to feed my babies, assuming of course that they will eat the food. So i made the recipe and oddly enough it was more of a porridge texture than any dish I can done so far as they we more mush textured. However my fatal flaw was the very thing that attracted me to this dish, the eggs. My husband is allergic to eggs which is why I have issues incorporating them into our food. He can eat eggs that are cooked into food but avoids custards and things that are very eggs. He did not have a reaction to this dish (I only used 2 eggs) but the whole idea of there being an egg in his porridge made the the porridge unpalatable to him. Of course Scarlett and Beau being who they are... the only one who ate any porridge was me. But alas I already eat oatmeal and would probably eat it plain if need be. So there I was with a whole pot of porridge. Seriously we live in a time of plenty and most food is just thrown away. But what of that wasn't the case? Plus my kids didn't eat any. So I tried to get creative. So I added some baking powder to the porridge and enough flour to make the pottage the same consistency as a stiff cookie. I think if I were British the word might be scone? Then I tossed the mess onto a cookie sheet for 15 minutes until the oat cakes were just starting to brown. Voila from their noses being turned up at porridge to them happily eating oat cake cookies. I guess in the end it doesn't really matter how the food is cooked just as long as some of it ends up in the babies.
Ingredients 3 cups water 1 cup powdered milk 1 1/2 cups rolled oats 1/2 teaspoon ground cinnamon 1/2 cup raisins 1/2 teaspoon vanilla extract 3 eggs 4 teaspoons butter 1 cup milk 3 tablespoons honey
Directions In a large saucepan, bring the water to a boil. Combine the powdered milk, oats and cinnamon; quickly stir into the boiling water. Return the mixture to a boil, then reduce heat and simmer for 5 to 10 minutes, or until the mixture is the desired thickness. Remove from heat and mix in the raisins and vanilla. Beat in the eggs one at a time, mixing well after each. The hot porridge will cook the eggs completely. Divide the porridge between 4 bowls. Top each one with a teaspoon of butter, 1/4 cup of milk , and drizzle with honey.

Wednesday, December 14, 2011

Let their be yogurt...

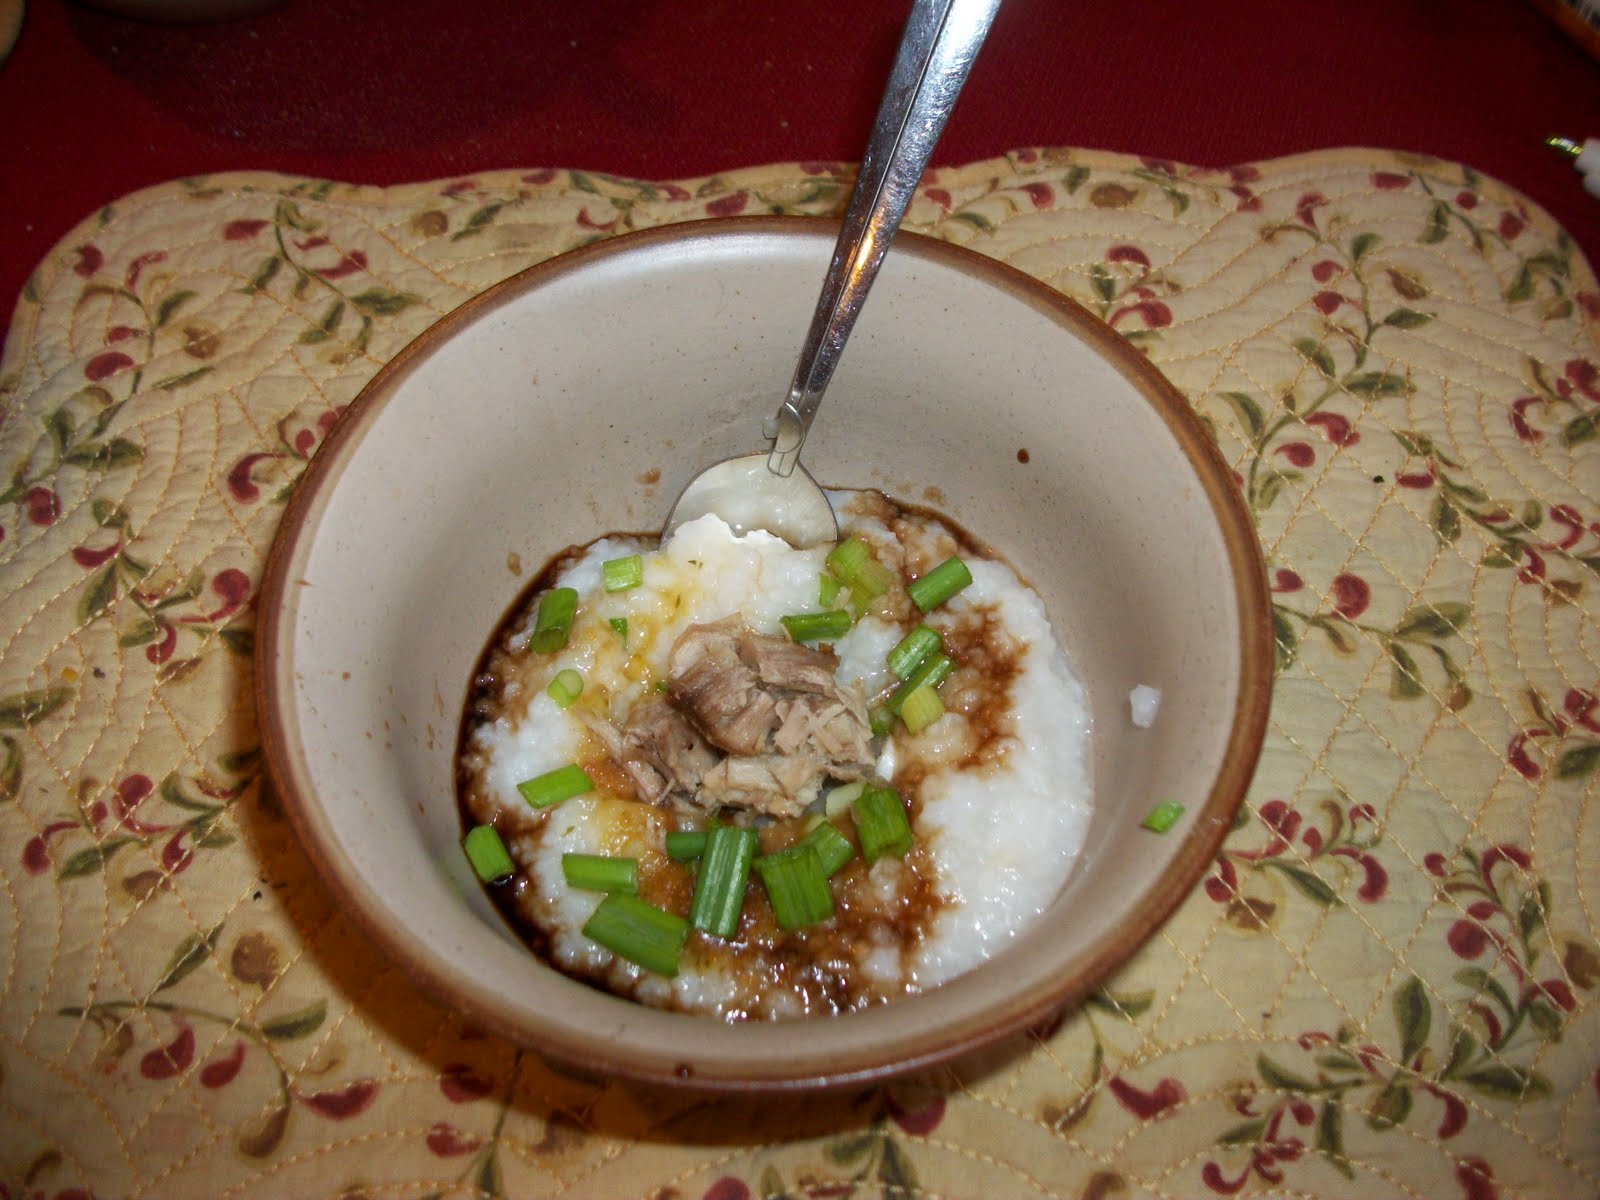
So I was feeding my kids snack yesterday and realized my kids live on dairy. Yes we have 20 acres but no cows or even goats. But when we did have goats we had a lot of milk and drinking milk is not the fastest way to get it gone. My kids like cottage cheese, yogurt and cheese. Now seriously I don't see the kids eating goat cheese at all. Not only that but I am paying a fortune for Stoneyfarm organic yougurt because they are the only yogurt in my local store made with whole milk. Since my kids are sitting at the 25% for height and 10% in weight I am willing to pay for the whole milk... but dang they are expensive. So i had an epiphany, what if I tried making homemade yogurt? I have an abundance of milk and just happened to have a vanilla greek yogurt in the fridge. So i found a recipe, dh watched a few people make yogurt on youtube, since I didn't know where I could put it to have it settle I watched them use crock pots, setting on the counter in blankets, and in the oven. In the end we used the oven. The yogurt turned out good, here is the recipe and a picture.
[IMG]http://i149.photobucket.com/albums/s68/azbrat0526/100_7925.jpg[/IMG]

HOMEMADE YOGURT

Read more about it at www.cooks.com/rec/view/0,1961,142161-226201,00.htmlContent Copyright © 2011 Cooks.com - All rights reserved.');
//-->
Read more about it at
www.cooks.com/rec/view/0,1961,142161-226201,00.htmlContent Copyright ©
2011 Cooks.com - All rights reserved.
Yogurt making is a fun and creative experience and an
excellent quality yogurt may easily be made at home at a great savings over
store bought.
Any kind of yogurt containing live active cultures may be used as a starter,
such as ACTIVIA®, DANACTIVE®, Greek Yogurts, Kefir, etc. Try different brands to
suit your needs and to find those that yield the best results.
In making yogurt, it's especially important that all utensils and equipment
be scrupulously clean to create a friendly environment for the yogurt culture to
thrive without competition.
Homemade Yogurt:
1 quart
milk1/4 to 1/2 cup non-fat dry milk
powder1/2 cup plain unflavored yogurt (such as
ACTIVIA®)2 tablespoons cream
(optional)
In a medium saucepan, combine all
ingredients except yogurt. Two tablespoons of cream (or more) may be added to
the basic recipe for a richer, creamier dessert yogurt or frozen yogurts. For
everyday yogurt or yogurt that is to be used in baking, the extra richness is
not needed.
Heat milk,
uncovered, over low heat, gradually bringing it nearly to a boil. Tiny bubbles
will form around the edges of the pan; the milk should reach a temperature
between 185-190°F.
If the milk is brought up to temperature too quickly, the bottom of the pan
is likely to scald. It is important not to allow the milk to boil. Remove any
milk which forms a skin on the surface.
Remove from heat and allow milk to cool for about 20 minutes, or until the
milk reaches a temperature of between 100-110°F. Stir in approximately 1/2 cup
of active live culture yogurt or yogurt starter.
Transfer the yogurt mixture to a good quality thermos or a yogurt maker and maintain
the temperature of about 100°F for 4-10 hours. A longer fermentation period will
yield a more tart yogurt. Leave the yogurt undisturbed or it will not thicken
well, and keep it free from drafts.
Refrigerate until ready to use. Flavor as desired, adding crushed, dried or
fresh fruit or fruit
cocktail
, sunflower or pumpkin seeds, Grape-Nuts, blueberries, strawberries,
raspberries, etc.
Use homemade yogurt for baking in any recipe calling for buttermilk, sour
cream or yogurt; it adds wonderful flavor and nutrition to quick breads,
muffins, pancakes and yeast breads.
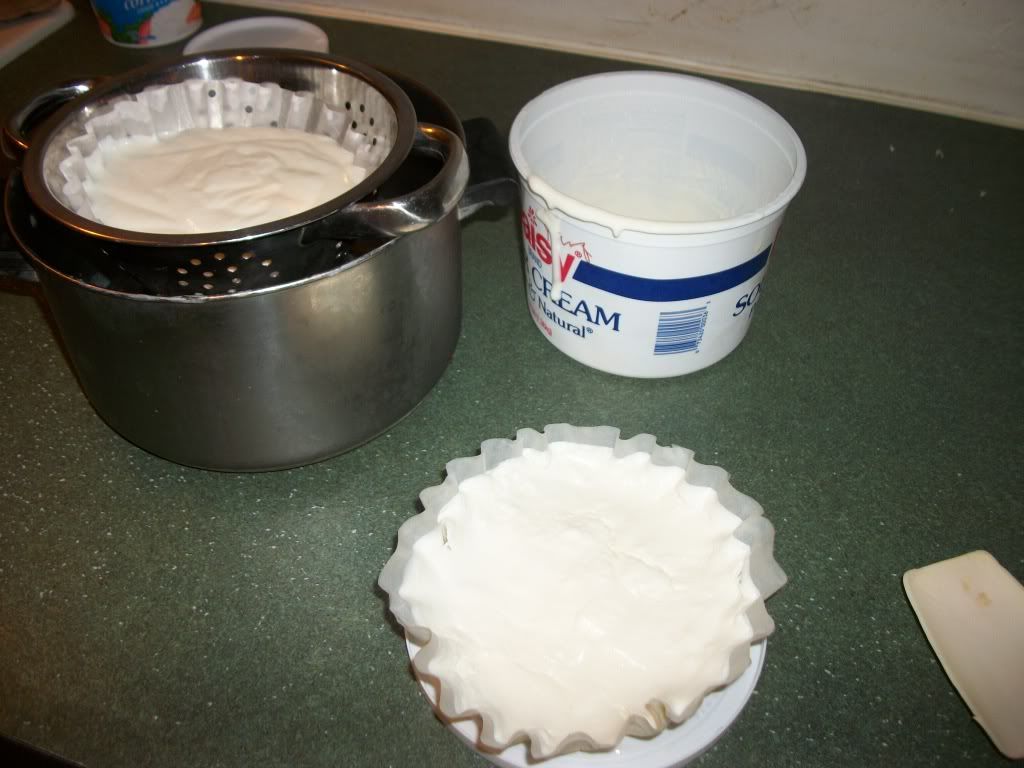
Another useful purpose for homemade yogurt is yogurt cheese. To make yogurt
cheese, drain freshly made yogurt in a cheesecloth hung in a cool place; this
can be used in many recipes as a healthy substitute for cream cheese.
Save half a cup of the unflavored yogurt as a starter for making the next
batch.
This yogurt is an economical way to produce quality yogurt for diet plans
which include daily consumption. The starter only needs to be purchased infrequently in
small amounts, and the yogurt strain can often be maintained indefinitely if you
make yogurt often. Use each batch of reserved starter within 5 days or start
again with fresh starter.
It's a good plan to purchase an 8 oz. container of yogurt for a new starter
once every 1 or 2 months, or when your own strain seems to be getting weaker
(the yogurt will not thicken as well). Dried active culture is also available in
packets and may be kept on the shelf in case you run out of fresh starter.
Ball 1/2 pint can or freeze jars, either plastic or glass, make excellent
single serve containers for storage. Some yogurt makers come with glass storage
containers; others make 1 quart batches rather than single serve portions.

Tuesday, December 13, 2011

... And I ate Rabbit.

So we are definately working on getting the "kids" to try new foods so if we ever have to live on the proceeds of our farm, in this case home grown rabbit. I admit the worst kid is me. I do not want to eat anything with bones in it. I could hardly choke it down, even though it tasted good.

MARINATED RABBIT STEW

Read more about it at www.cooks.com/rec/view/0,1748,154172-235206,00.htmlContent Copyright © 2011 Cooks.com - All rights reserved.');
//-->
Read more about it at
www.cooks.com/rec/view/0,1748,154172-235206,00.htmlContent Copyright ©
2011 Cooks.com - All rights reserved.
A lemon-herb marinade blends with
the flavor or rabbit to make a pleasantly spicy stew. Plan to start the day
before - for best results, the rabbit should marinate for 24 hours. For 4
servings you will need:
3-4 lb.
rabbit, cut up1/3 c. olive oil3 tbsp. fresh lemon juice2
1/2 tbsp. soy sauce2 tsp. grated lemon
rind4 cloves garlic, minced or
pressed1 tsp. dried rosemary1/2 tsp. fennel seeds1 tsp.
salt1/2 tsp. black pepper1/4 c. all-purpose flour2-3
tbsp. butter1/4 c. Madeira or dry
sherry3 c. chicken broth1 bay leaf2 tbsp. all-purpose
flourParsley for garnish
1. Rinse rabbit and pat dry.
Place into deep bowl or plastic bag. Set aside.
2. Combine olive oil, lemon juice, soy sauce, lemon rind, garlic, rosemary
and fennel. Pour over rabbit. Cover and refrigerate for 24 hours.
3. Drain and place rabbit pieces on waxed paper. Sprinkle on both sides with
salt, black pepper and flour.
4. Heat butter in heavy skillet and brown rabbit until golden. Transfer to
deep casserole.
5. Add Madeira or sherry to pan. Heat to boiling. Add broth. Boil and scrape
pan clean.
6. Pour over rabbit. Add bay leaf. Cover and bake at 350 degrees for 1 1/2 to
2 hours or until rabbit is very tender. Remove rabbit to serving dish and keep
warm.
7. Add flour to skillet. Stir in 2 to 3 tablespoons juices to make a paste.
Gradually add remaining juices. Cook, stirring, until thickened.
8. Pour sauce over rabbit and garnish with parsley.
Good served with: Mashed potatoes or hot cooked wild rice, spinach salad and
a hearty red wine, if you like.